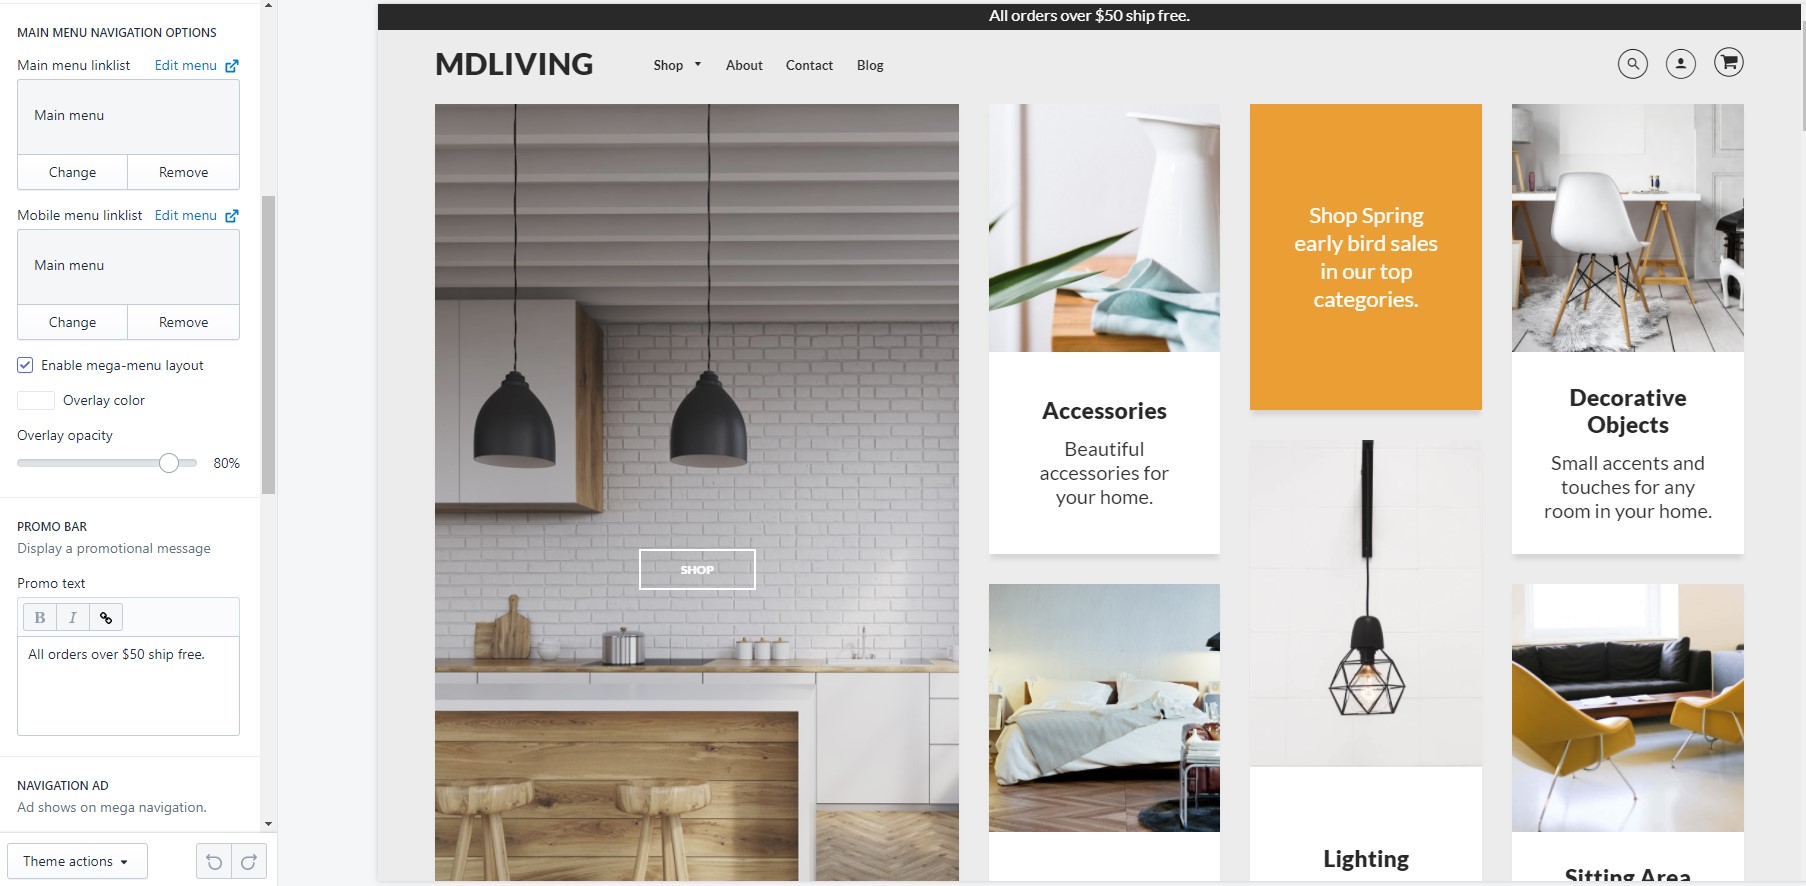
Sample mega menu navigation from the Nashville demo store.
Introduction
In this section you will learn how to:
- Create navigation menus
1. Create navigation menus
Directions for Loft version 1.3.5 and below
The Loft mega menu navigation relies on the correct setup of Shopify navigation menus. While Loft uses the same setup mentioned here, in Shopify's documentation for creating menu dropdowns, we'll cover that here as well.
Using the image below as your guide, do the following:
1. Create your main menu. Decide which link(s) should contain a dropdown. For this demo, we'll create a dropdown for "Shop" (box A).
2. Next, create another menu that contains links for each of the "Heading" links, as seen in the image at the top of this page (box B). This menu should have the same name as the link from the previous step ("Shop").
3. Finally, create linklists, that share the same name as each of the "Heading" links (all letter C boxes).
When you're all done, be sure to navigate to the "Header" section, and specify the "Main menu" link list (or whatever you've named it) in the "Main menu navigation options" dropdowns. You have the ability to show a completely different navigation for your mobile experience, too!
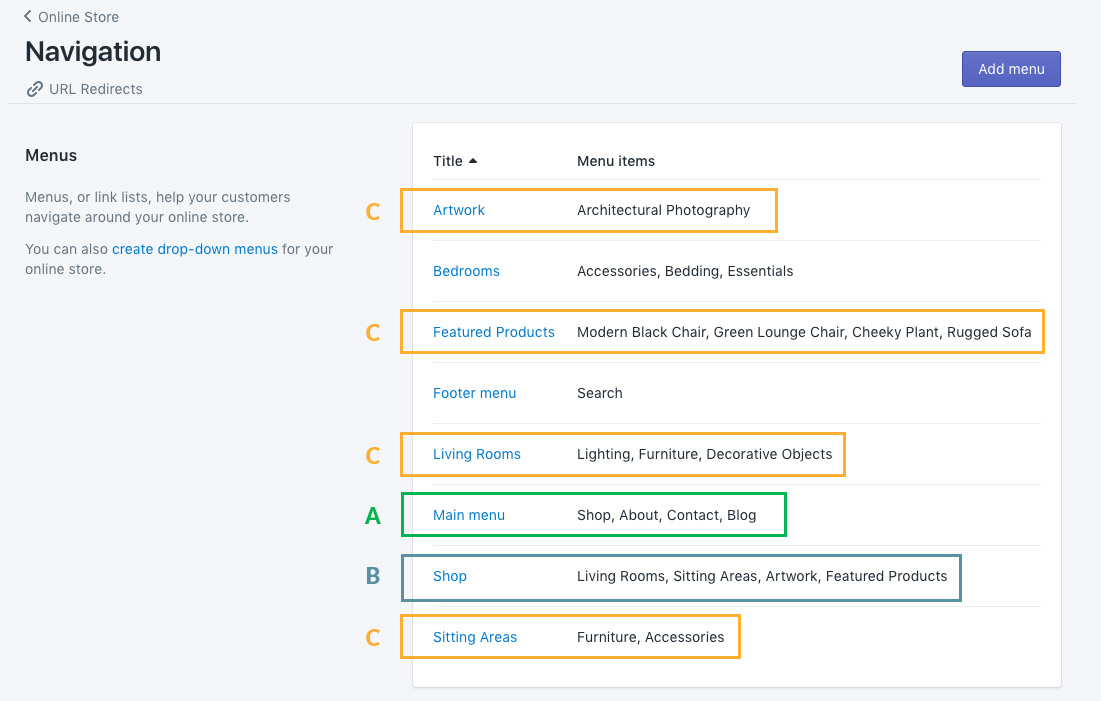 Example mega menu setup with nested links.
Directions for Loft version 1.3.5 and above
Create a mega menu in the Loft theme by doing the following steps:
- Go to Online Store>Navigation
- Click the "Add menu" button
- Click the "Add menu item" button
- Enter a name and a link for the header menu item.
- To add a nested item, repeat steps 3,4 for your new item and then drag n drop it below the main item.
- Click the "Save menu" button